Make a super cute faceless crochet bunny that’s perfect for Easter, spring, or any occasion.
With its fluffy pom-pom tail and easy-to-follow pattern, this amigurumi project makes for an adorable gift or addition to your crochet collection.
Whether you're an experienced or new crocheter, this bunny is a fun and satisfying project to bring to life!

If you’d like more crochet projects you can comfortably finish in a day, you can browse the full range of same day crochet projects for easy, enjoyable makes you can complete from start to finish.
Table of contents
Crocheting cute animals is one of the most rewarding parts of this craft, and if you’re looking for a simple yet adorable project, this faceless crochet bunny is the way to go.
This bunny pattern is great for both beginners and experienced crocheters. It’s easy to make, with minimal sewing, and features a fluffy pom-pom tail that adds a special touch.
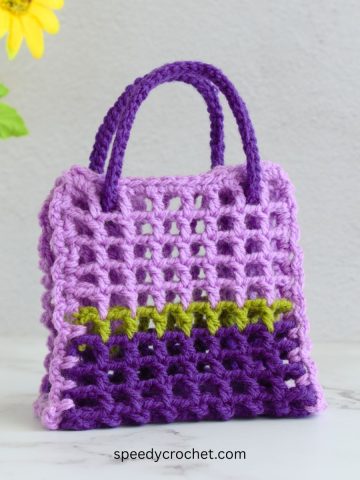
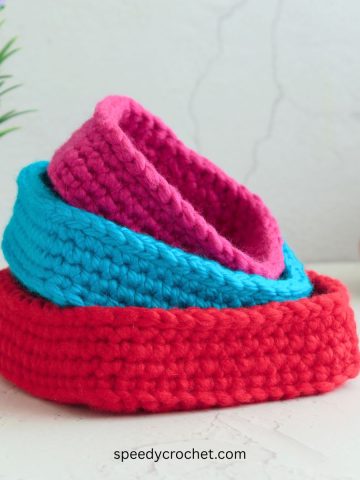
If you like no sew patterns you might like this little crochet basket or this crochet bunny pouch.
What Makes This Bunny Rabbit So Perfect?
For one, it’s a versatile piece. This crochet bunny can be made in any color to match your personal style or season—think pastel colors for Easter, or a more neutral palette for a cozy addition to your home decor. Plus, it’s not just for springtime!
The simple, faceless design makes it an ideal gift for any occasion, whether you’re celebrating a birthday or giving a heartfelt homemade present to a loved one.
Made with worsted yarn and a 4mm hook, this bunny has a lovely, soft texture that’s both huggable and display-worthy.
The fluffy pom-pom tail gives it an extra dose of charm, and because the pattern is low on sewing, it’s a quick and easy project to finish.
If you’re a beginner looking for an amigurumi pattern that’s simple and fun, this crochet bunny is the perfect project to start with.
Not only will you end up with a cute stuffed animal, but you’ll also get the satisfaction of creating something unique and handmade, perfect for gifting or keeping as a cozy decoration.
Ready to hop into this fun project? Let’s gather your materials and dive into the easy steps of making your very own faceless crochet bunny!
Why You Will Love This Pattern
- Easy to Make: This pattern is perfect for beginners, offering a simple construction that doesn’t require a lot of experience or complicated techniques.
- Minimal Sewing: The pattern involves very little sewing, so you can get through the project quickly without the hassle of stitching together many parts.
- Fluffy Pom-Pom Tail: The adorable pom-pom tail adds a fun, playful element to your bunny, making it even more charming.
- Great for Gifts: This bunny makes for an amazing DIY gift that’s perfect for Easter, birthdays, or just because.
- You can customize your bunny’s color and size to match different themes or occasions, making it a perfect addition to any decor.
- Quick and Easy: With minimal sewing and a quick pattern, you’ll finish this project in no time, leaving you with a cute stuffed toy that you’ll love.
Materials
Yarn
#4 medium (worsted, Afghan, Aran, 10ply), 100% acrylic yarn with about 11 WPI.
- You will need about 55 yards (50 meters) yarn in your choice of color.
Hook Size
- 4mm
Notions
- Scissors
- Yarn Needle
- Stitch marker
- Toy stuffing
- Fabric glue (optional)
Stitches and Abbreviations - US Terms
- BLO – back loop only
- FLO – front loop only
- ch – chain stitch
- invdec – invisible decrease
- MR -magic ring
- rnd – round
- rpt - repeat
- sc – single crochet
- sl st – slip stitch
- sp - space
- st/sts – stitch/stitches
- [ ] – at the end of a round indicates the number of stitches in that round.
Finished Size

This crochet bunny stands about 4.5 inches (11.5cm) tall from the base to the top of the head, 7 inches (18cm) tall from the base to the tip of the ear, and about 2.5 inches (6.5cm) wide.
Gauge
The gauge is not so important for this pattern.
Pattern Notes
- Use a stitch marker to make the first stitch of round.
Instructions
Body
Rnd 1 – In a MR, make 8sc, sl st into 1st st to join. [8sc]
Rnd 2 – ch1 (not a st), 2sc in same sp as sl st, 2sc in next 7-sts, sl st into 1st st to join. [16sc]
Rnd 3 – ch1 (not a st) 1sc in same sp as ch1, 2sc in next st, *1sc in next st, 2sc in next, rpt from * 7 times, sl st into 1s st to join. [24sc]
Rnd 4 – ch1 (not a st) 1sc in same sp as ch1, 1sc in next st, 2sc in next st, *1sc in next 2-sts, 2sc in next, rpt from * 7 times, sl st into 1st st into the BLO of 1st st to join. [32sc]

Rnd 5 – ch1 (not as st), 1sc same sp as ch-1, then 1sc in BLO of next 31-st, do not sl st into next st. Note: the pattern will be work in continuous rnds from now on. [32sc]

Rnd 6 – 1sc in next 32-sts. [32sc]
Rnd 7 – *1sc in next 3-sts, 2sc in next, rpt from * 8 times. [40sc]
Rnd 8-11 – 1sc in next 40-sts [40sc in each rnd]

Rnd 12 - * 1sc in next 3-sts, invdec, rpt from * 8 times. [32sc]
Rnd 13 – 1sc in next 32 sts [32sc]
Rnd 14 - 1sc in next 2-sts, invdec, rpt from * 8 times. [24sc]
Rnd 15 – 1sc in next 24-sts. [24sc]
Rnd 16 - *1sc in next st, invdec, rpt from * 8 times. [16sc]
Rnd 17-19 – 1sc in next 16-sts. [16sc]

Stuff – Firmly stuff the body with toy stuffing, but don’t over stuff because you want the base to sit flat.
✨ You're almost there! ✨
To unlock the final steps and complete your pattern, create a free account with Grow.me. below.
Make sure to tick the box to subscribe to our newsletter and stay up to date with the latest patterns, tips, and more!
Once you're signed up, you'll get instant access to finish your project and enjoy exclusive content in the future.
Already signed up? Hit the button below and select ‘Switch to Log In’ to pick up where you left off and finish your project!

Rnd 20 – 1sc in BLO of next 16-sts. [16sc]
Rnd 21 – work in FLO sts of rnd 20. To help you find the FLO fold the sts made in previous rnd down to the inside of the neck, then * 1sc in next st, 2sc in next, rpt from * 8 times. [24sc]

Rnd 22 – * 1sc in next 2-sts, 2sc in next, rpt from * 8 times. [32sc]
Rnds 23 -25 – 1sc in each st. [32sts in each rnd]
Rnd 26 - * 1sc in next 2-sts, invdec, rpt from * 8 times. [24sc]
Rnd 27 - * 1sc in next st, invdec, rpt from * 8 times. [16sc]

Stuff – Fill head with stuffing
Rnd 28 - *invdec, rpt from * 8 times, cut yarn, leave a long tail for sewing, thread the yarn tail onto a needle, working your way around the remaining stitch, draw the needle and yarn under the front loops of each stitch, pull tight to close the opening, weave in the end.
Ear – make 2
Rnd 1 – 6sc into a MR, pull yarn tail tight to close the ring. [6sc]
Rnd 2 – *1sc in next, 2sc in next, rpt from * 3 times. [9sc]
Rnd 3 - *1sc in next 2-sts, 2sc in next, rpt from * 3 times. [12sc]
Rnds 4-5 – 1sc in each st. [12sc in each rnd]
Rnd 6 – * 1sc in next 2-sts, invdec, rpt * from 3 times. [9sc]
Rnds 7-9 - 1sc in each st. [9sc in each rnd]
Rnd 10 – *1sc in next st, invdec, rpt from * 3 times. [6sc]
Rnd 11 – 1sc in each st. [6sc]
Rnd 12 – with your fingers press the opening closed and make 3sc along the edge (working through both layers to close the opening), cut yarn, leave a long tail for sewing and fasten off.
This completes one ear make a second ear.

Finishing
Attach ears
Use pins to position the ears to the top of the head just behind the centre, once you are happy with the position, thread the yarn tail onto a needle and sew each ear in place.

Tail
Wrap yarn around 4 fingers about 40 to 50 times (the more wraps the fuller the tail), remove from your fingers, tie and securely knot the bundle with a 30 cm piece of yarn, leave the ends long for easy holding when shaping the pom-pom.
Hold the long ends in one hand and cut the loops on both sides, then trim into a ball. It does not have to be perfect at this stage.
Attach the pom-pom tail to the bunny
Hold the long tail ends of the knot in one hand and flatten the pom-pom on this side – attach this side to the back of the bunny.
You can either sew the tail onto the bunny using the long yarn tails or glue it on.
Once the tail is secure, use your scissors to trim the pom-pom into an even rounded shape.

Expert Tip
Pom-Pom Tip: If you want an extra fluffy pom-pom tail, use a thicker yarn or wrap the yarn more times to get a fuller look.
Use Safety Eyes for a Professional Touch: If you prefer a slightly more detailed look but still want to keep it faceless, you could use small safety eyes or buttons for a simple but cute finish.
Perfect for Leftover Yarn: This project is great for using up leftover worsted yarn in your stash, making it an excellent stash-busting project.

Variations/Color Schemes/Ideas:
Pastel Bunnies for Easter: Soft colors like baby pink, lavender, and mint green would be perfect for a spring-themed bunny.
Neutral Bunnies for Home Decor: Go for neutral shades like beige, gray, or white for a cozy, modern look.
Multi-Color Bunnies: Try making bunnies in multiple colors to create a whole family of them, perfect for kids or as decorative pieces.
Bunny with Scarf: Add a little crocheted scarf around the bunny’s neck for an extra cute touch.
Mini Bunnies: Make smaller versions, using light weight yarn (like #1 baby or #2 sport) and a smaller hook to make keychains or as adorable mini gifts.
Fluffy Tail Variation: Instead of a pom-pom, try making a crocheted fluffy tail by working a few rounds of chains and slip stitches to create a textured look.
FAQ
Yes! You can easily adjust the size by using thicker yarn or a larger hook to create a bigger bunny.
Consider adding a crocheted bow or a little vest for a fun and customizable look.

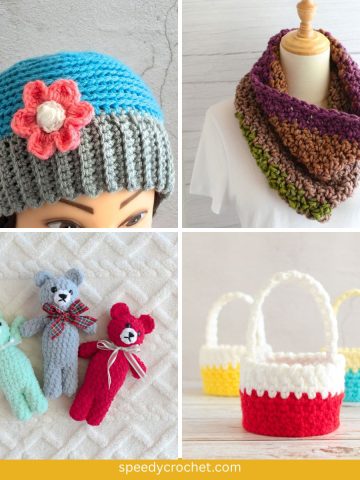
More Easy Crochet Patterns
Looking for more patterns like this? Try these:
- Crochet Mini Tote Bag Pattern (Easy Gift Bag Crochet Project)
- Small Square Crochet Basket Pattern Set
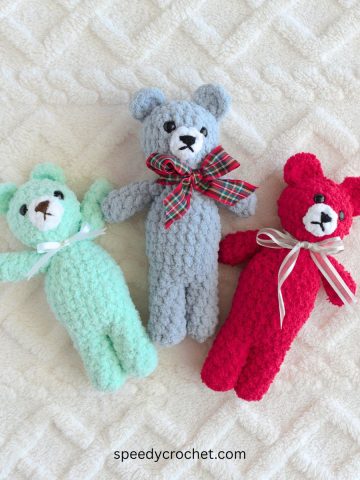
- Small Crochet Bear - Frederick
- Sunflower Crochet Drawstring Pouch

If you tried this crochet bunny (or any other pattern on my website), please let me know how it went in the comments below. I'd love to hear from you!
What's Next?
- Pin this post: Save this post to Pinterest so that you can come back to it later.
- Share: Share a photo on social median and tag me @speedycrochet. We would love to see your creations!
- Leave a comment: Say hello and share your feedback in the comments section below.