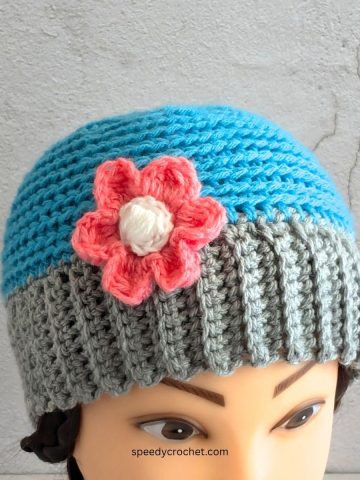
If you love cute and cozy crochet projects, this crochet cat beanie is for you!
Made in three colors for a fun, playful look, this adult-size hat pattern is simple enough for beginners and quick enough to finish in just a few hours.
The design features adorable cat ears, a soft and stretchy fit, and a cozy feel that’s perfect for cooler days.
Whether you wear it yourself or make it as a gift, this cozy crochet cat hat is sure to make everyone smile!

Some crochet projects are practical; some are just plain fun - and this one happens to be both! This crochet cat beanie combines everything you love about a cozy hat with a touch of playful charm.
With its cute little cat ears and soft texture, it’s the kind of project that’s as fun to make as it is to wear.
This pattern is designed for adults, but it’s so easy to adjust that you could make it for anyone.
It’s worked from the top down, using simple stitches that beginners will love.
You’ll start by crocheting the main body of the hat, then when joined you create the cat ears with a few simple stitches.
The beanie is made using three colors, which gives it a cheerful, creative look. You can go for subtle shades for something classic or bright colors for a bold, fun twist.
The pattern uses basic stitches, so even if you’re new to crochet, you’ll be able to follow along without any trouble.
Because it’s made with worsted weight yarn, it works up quickly and feels just the right amount of cozy - soft enough to wear all day, but warm enough for those chilly fall and winter days.
Most people can finish it in just a few hours, making it a great weekend or evening project.
So, whether you’re a cat lover, a cozy hat fan, or just want a fun handmade accessory, this crochet cat beanie is sure to become one of your favorites.
You might also like this ribbed crochet cat beanie pattern.
Table of contents
- Things To Note:
- How This Pattern Works
- Choosing Your Yarn and Colors
- Tips for Success
- Make It Your Own – Fun Variations
- Styling Your Crochet Cat Beanie
- Perfect for Beginners and Busy Makers
- Materials
- Stitches and Abbreviations - US Terms
- Finished Size
- Gauge
- Pattern Notes
- Instructions - Crochet Cat Beanie
- ✨ You're almost there! ✨
- Finishing
- Pattern FAQs
- More Quick Crochet Patterns
- What's Next?
- Comments
Things To Note:
- Beginner-Friendly - Simple stitches and easy shaping make this pattern great for anyone.
- Quick to Make - You can finish your beanie in just a few hours!
- Fun Three-Color Design - Adds personality and lets you play with color combinations.
- Low Sewing Required - The ears are worked into the hat, not added later.
- Perfect for Gifting - A fun and cozy handmade gift for cat lovers.
- Comfortable Fit - Soft, stretchy, and made to fit most adult heads.
- Customizable - Adjust the height or colors to make it your own.
How This Pattern Works
This pattern starts with a simple foundation chain, then joined and worked in rounds. You will start at the top and continue working down to form the body of the hat.
The crown is not shaped by decreasing, instead it has a flat top seam, which creates two natural corners. When you put the hat on and gently shape those corners, voilà - instant cat ears!
The ears can be left as is or given more definition by sewing a diagonal line down the top corners.
This method makes it super simple. There’s no need to crochet separate ears or sew them on later. You just shape and go. It’s one of the easiest ways to make a cute animal hat, and it looks amazing every time.
Choosing Your Yarn and Colors
This pattern uses three colors of worsted weight yarn, which gives you a chance to get creative. You can mix and match colors to suit your style -classic cat shades, soft pastels, or bright pops of color.
Here are some fun color ideas to try:
- Classic Cat - Gray, white, and black for a realistic look.
- Soft & Sweet - Blush pink, cream, and taupe for a cozy feminine style.
- Bold & Bright - Purple, teal, and mustard for a playful twist.
- Festive - Red, white, and green for a holiday-inspired cat beanie.
- Rainbow Cat - Use small amounts of different colors for each stripe!
The yarn choice really sets the tone - go for soft acrylics or blends for easy care or try cotton for a lighter spring version.
Tips for Success
- Start with a loose foundation chain so your brim stays stretchy – go up a hook size here if you need to.
- Change colors neatly by finishing your last stitch of the old color with the new yarn.
- Keep your tension even - looser stitches give your beanie more drape and comfort.
- Shape your ears by gently pinching and folding the top corners once the hat is done.
Make It Your Own – Fun Variations
- Add Whiskers - Use a bit of black yarn or embroidery floss to stitch tiny whiskers on the front.
- Add a Bow - A small crochet bow on one ear gives a cute, playful touch.
- Try Wide Stripes - Make wide color stripes instead of narrow bands for a fun, multi-colored look.
- Gift Idea - Perfect for birthdays, Christmas, or anyone who loves cats
Styling Your Crochet Cat Beanie
This beanie looks cute with anything - from cozy sweaters to casual jackets. The ears add a subtle touch of fun without feeling too over-the-top. It’s also great for Halloween costumes, casual winter wear, or gifting to cat lovers.
You can pair it with a matching scarf or mittens in one of your three colors or even make a whole “cat-inspired” crochet set.
If you’re selling handmade items, this hat makes a great craft fair item - it’s quick to make, uses small amounts of yarn, and always gets attention!
Perfect for Beginners and Busy Makers
If you’re new to crochet or just want a simple, relaxing project, this pattern is perfect. The stitches are repetitive and soothing, and the color changes keep things interesting.
You don’t have to worry about sewing separate pieces, shaping complicated parts, or remembering long stitch patterns.
In just a few hours, you’ll have a finished hat that’s soft, cute, and ready to wear. It’s a great way to use up yarn from your stash, experiment with color, or just enjoy a cozy weekend crochet session.
Materials
Yarn
#4 medium (worsted, Afgan, Aran, 10ply) yarn with about 11 wraps per inch (WPI)*
- Color A Dark Blue – yards (75 meters)
- Color B Light Blue – yards (40 meters)
- Color C – White – yards (40 meters)
*Wraps per inch (WPI) - measures yarn thickness by counting how many times the yarn wraps around a ruler in one inch. More wraps thinner yarn, while fewer wraps thicker yarn.
Hook Size
- 5mm
Notions
- Scissors
- Yarn Needle
Stitches and Abbreviations - US Terms
- ch - chain
- col - color
- dc - double crochet
- sl st - slip stitch
- st/s - stitch/stiches
- [ ] - at the end of a row indicate the number of stitches in that row
Finished Size

Medium size hat suites head size 19 – 21 inches
When laid flat the hat measures about 10inches (25cm) wide and 7.5 inches (19cm) tall with the brim folded up.
Gauge
4x4 inches(10x10cm) = 12 double crochets and 9 rows
Pattern Notes
- Weave in the ends as you go.
- This pattern is worked from the top down.
Instructions - Crochet Cat Beanie
Foundation, col A, start with a long yarn tail (this will be used for sewing), ch70 – or as many as needed to fit your head circumference, sl st into 1st ch to join (being careful not to twist the foundation ch)
Row 1, col A – ch2 (not counted as a st) 1dc in same sp as ch2, 1dc in each st around, sl st into 1st to join. [70sts]
Row 2, col B - ch2 (not counted as a st) 1dc in same sp as ch2, 1dc in each st around, sl st into 1st st to join. [70sts]
Row 3, col C - ch2 (not counted as a st) 1dc in same sp as ch2, 1dc in each st around, sl st not 1st st to join. [70sts]
✨ You're almost there! ✨
To unlock the final steps and complete your pattern, create a free account with Grow.me. below.
Make sure to tick the box to subscribe to our newsletter and stay up to date with the latest patterns, tips, and more!
Once you're signed up, you'll get instant access to finish your project and enjoy exclusive content in the future.
Already signed up? Hit the button below and select ‘Switch to Log In’ to pick up where you left off and finish your project!

Row 4, col A – ch2 (not counted as a st) 1dc in same sp as ch2, 1dc in each st around, sl st into 1st to join. [70sts]
Row 5, col B - ch2 (not counted as a st) 1dc in same sp as ch2, 1dc in each st around. Sl st into 1st st to join. [70sts]
Row 6, col C - ch2 (not counted as a st) 1dc in same sp as ch2, 1dc in each st around, sl st not 1st st to join. [70sts]
Row 7, col A – ch2 (not counted as a st) 1dc in same sp as ch2, 1dc in each st around, sl st into 1st to join. [70sts]
Row 8, col B - ch2 (not counted as a st) 1dc in same sp as ch2, 1dc in each 9t around. Sl st into 1st st to join. [70sts]
Row 9, col C - ch2 (not counted as a st) 1dc in same sp as ch2, 1dc in each st around, sl st not 1st st to join. [70sts]
Row 10, col A – ch2 (not counted as a st) 1dc in same sp as ch2, 1dc in each st around, sl st into 1st to join. [70sts]
Row 11, col B - ch2 (not counted as a st) 1dc in same sp as ch2, 1dc in each st around. Sl st into 1st st to join. [70sts]
Row 12, col C - ch2 (not counted as a st) 1dc in same sp as ch2, 1dc in each st around, sl st not 1st st to join. [70sts]
Row 13 col A – ch2 (not counted as a st) 1dc in same sp as ch2, 1dc in each st around, sl st into 1st to join. [70sts]
Row 14, col B - ch2 (not counted as a st) 1dc in same sp as ch2, 1dc in each st around. Sl st into 1st st to join. [70sts]
Row 15, col C - ch2 (not counted as a st) 1dc in same sp as ch2, 1dc in each st around, sl st not 1st st to join. [70sts]
Row 16-20, col A – ch2 (not counted as a st) 1dc in same sp as ch2, 1dc in each st around, sl st into 1st to join. [70sts]
Finishing
- Turn hat inside out and weave in all the yarn tails except the starting yarn tail.
- Fold the hat flat so that the starting yarn tail is located on a side seam. You can either crochet slip stitch or thread the yarn tail onto a needle and sew the opening closed. Turn hat right side out, and fold up the brim.

- Shape the ears (optional) – Define the ears by stitching through both layers at a diagonal at the top of the hat. Start 10 stitches in from each end and go 5 rows down.

Pattern FAQs
Yes! You can easily adjust the fit by changing your hook size or the number of stitches in your foundation chain. A smaller hook makes a tighter hat, while a larger one gives more room.
Not at all! The pattern looks great in one, two, or more colors.
Once you finish the hat, you can pinch the top corners and add a few stitches or a tiny tie to hold them in place for extra pointy ears.

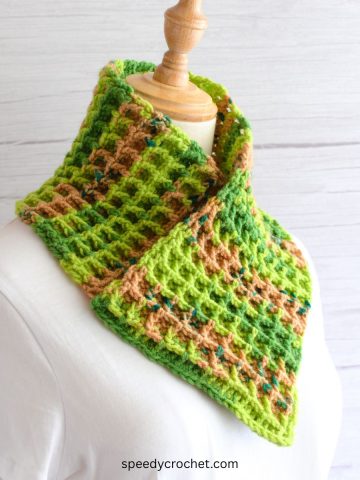
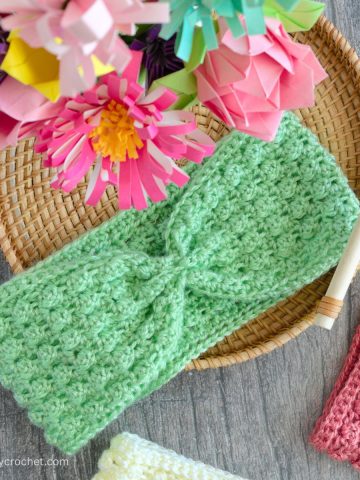
More Quick Crochet Patterns
Looking for more patterns like this? Try these:
If you tried this crochet cat beanie (or any other pattern on my website), please let me know how it went in the comments below. I'd love to hear from you!
What's Next?
- Pin this post: Save this post to Pinterest so that you can come back to it later.
- Share: Share a photo on social median and tag me @speedycrochet. We would love to see your creations!
- Leave a comment: Say hello and share your feedback in the comments section below.