A pumpkin crochet soap saver is a quick and practical project that adds a simple autumn touch to your bathroom.
This easy crochet soap pouch works up in under an hour and is a useful way to make the most of every last piece of soap.
The ribbed texture created with front post stitches gives it a soft pumpkin-inspired shape that makes it perfect for autumn.
For more quick crochet ideas, take a look at all 1 hour crochet projects.
Table of contents
- Pattern Details
- Why You’ll Love This Crochet Soap Saver Pattern
- Design Features
- Designer Notes
- How to Use Your Crochet Soap Sack
- Part of a Collection
- Tips For Crocheting A Pumpkin Soap Saver Pouch
- Materials
- Stitches and Abbreviations - US Terms
- Special Stitches And Terms
- Gauge & Finished Size
- Pattern Notes
- How To Crochet A Soap Saver Bag
- FAQs – Crochet Pumpkin Soap Saver Pouch
- Perfect For
- Quick Crochet Pumpkin Soap Saver
- Looking for More Crochet for Fall?
- More Easy 1 Hour Patterns
- What's Next?
- Comments
Pattern Details
- Skill Level - Beginner
- Yarn Weight - #3 light
- Hook Size – 3.5mm, 4mm, 5mm
- Measures - 5 inches (12.7 cm) by 6 inches (15.2 cm)
- Time To Complete - Less than 20 minutes
Why You’ll Love This Crochet Soap Saver Pattern
- Beginner-friendly and fun to make
- Works up in less than 60 minutes
- Great small crochet project for gifting or markets
- Eco-friendly alternative to plastic soap holders
- Adds charm to your crochet bathroom décor
- Perfect for using up leftover cotton yarn
Design Features
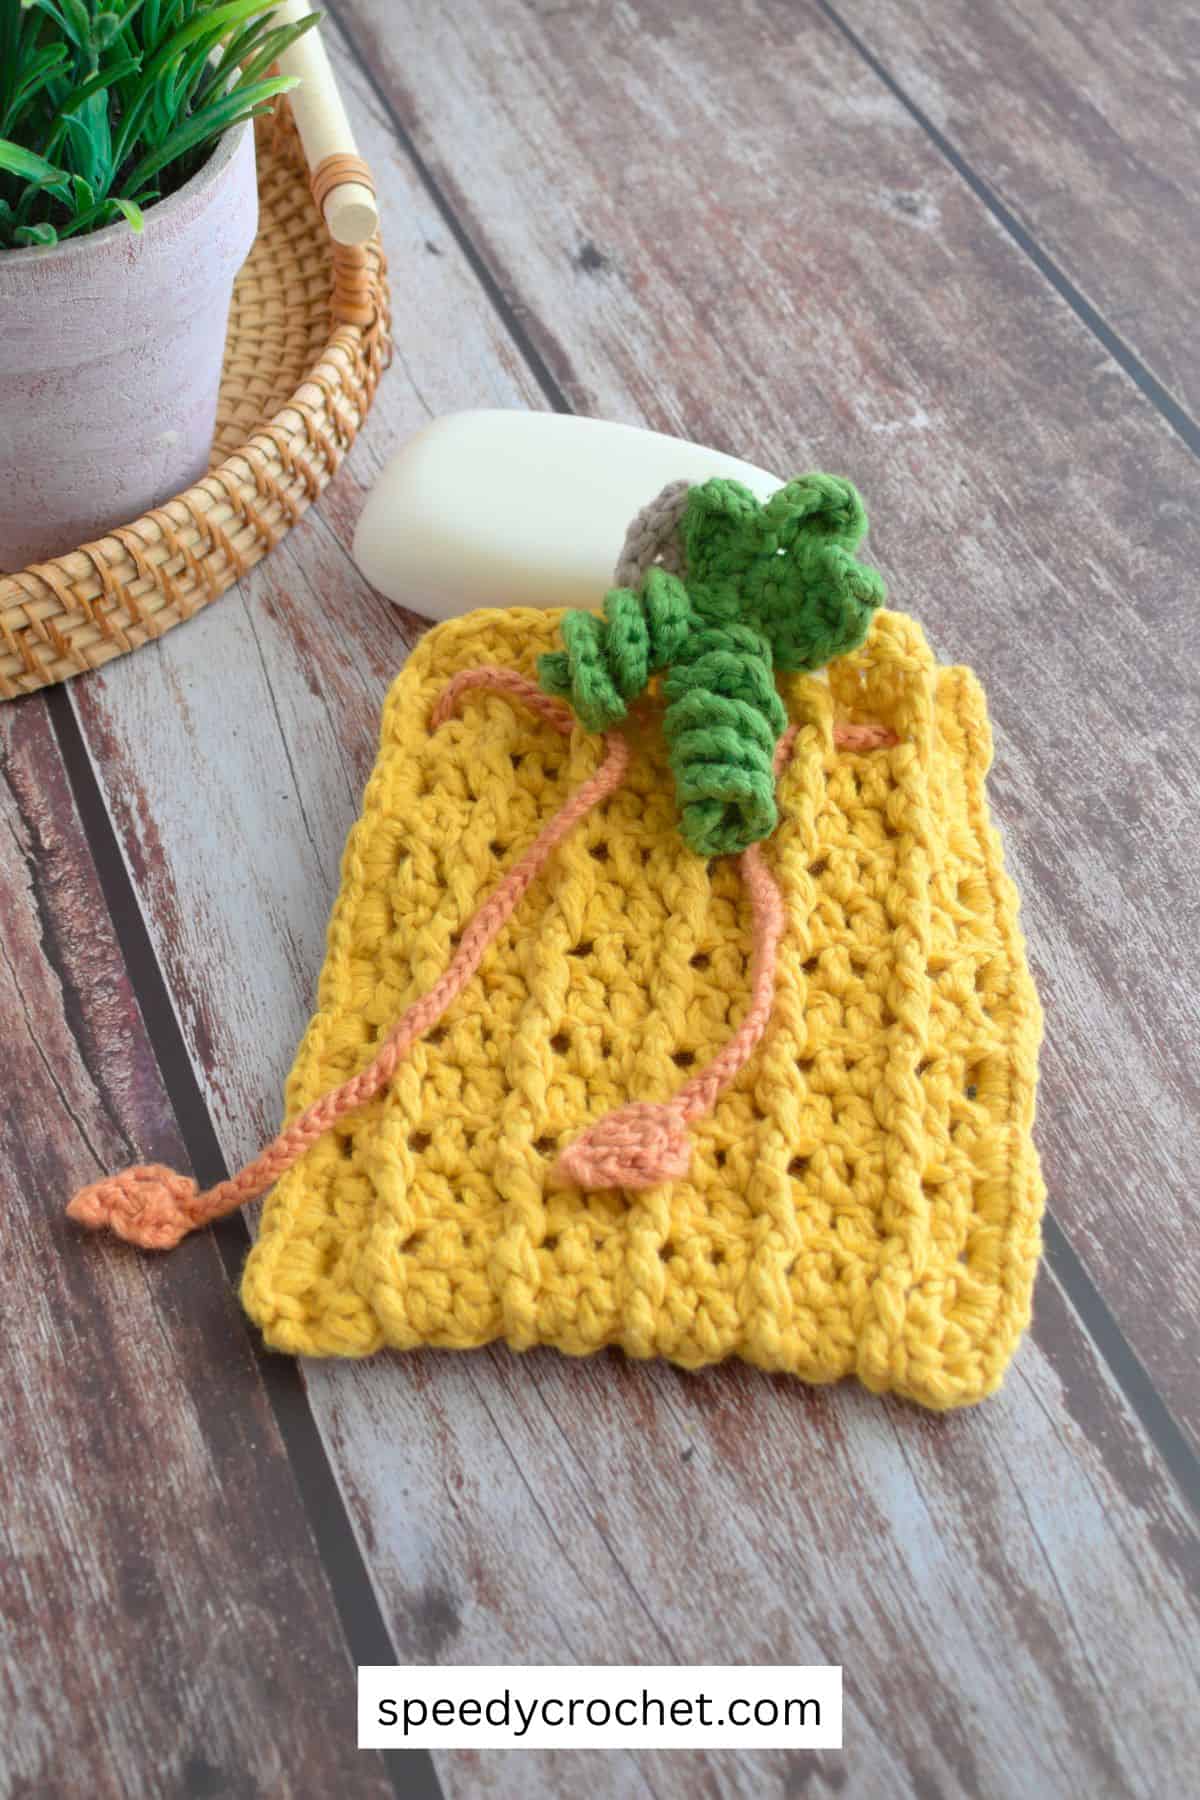
This crochet soap saver bag pattern is designed to be both functional and decorative it has a:
- Textured ribbed body created with front post stitches
- Cute pumpkin look perfect for fall crochet ideas
- Decorative stem, leaf, and tendril for a seasonal finish
- Drawstring closure to keep your soap secure
It’s a simple way to bring crochet home décor ideas into your bathroom while making something useful.
Designer Notes
This pumpkin crochet soap saver is a quick and practical project that adds a simple autumn touch to everyday routines.
The front post and back post stitches create the ribbed texture that gives the pouch its pumpkin-inspired shape and helps define the segments.
Keep your tension even as you work so the fabric stays flexible while still holding its shape. It’s also a good idea to check the fit against your soap bar as you crochet, since soap sizes can vary.
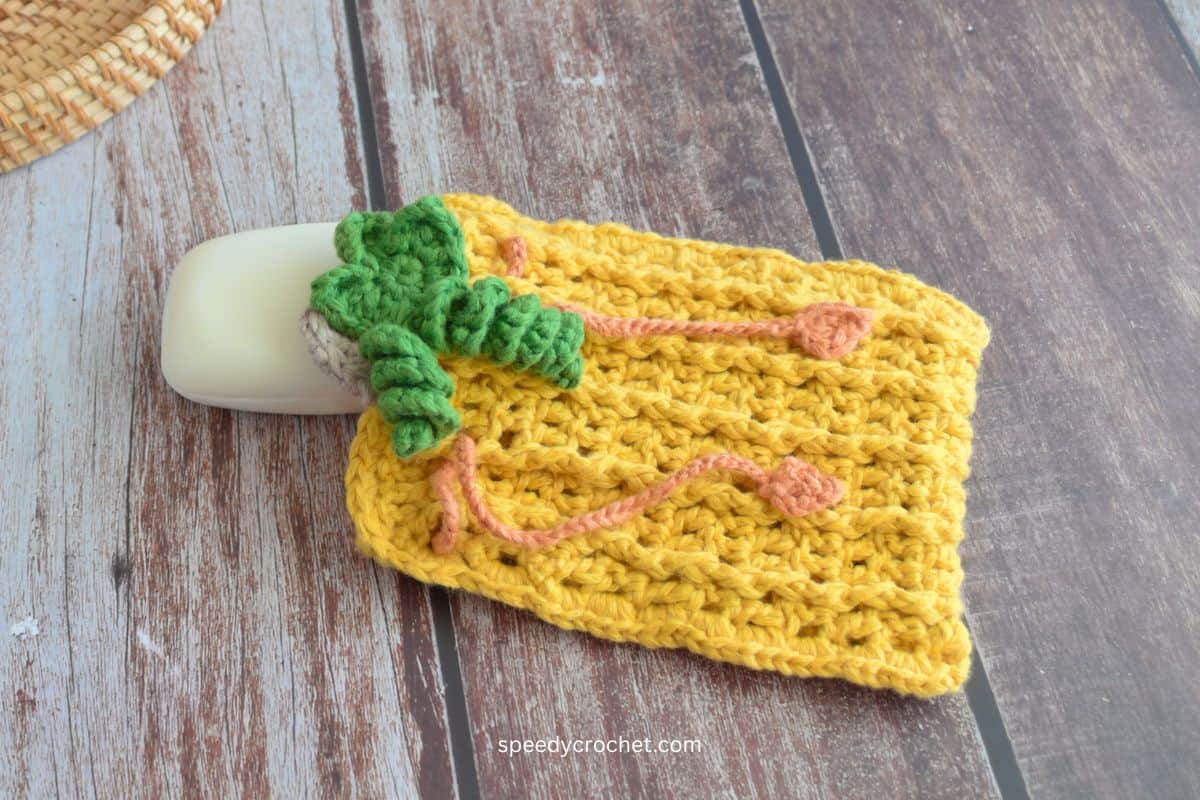
How to Use Your Crochet Soap Sack
Place your soap inside the bag and pull the drawstring closed. The textured stitches help create a gentle exfoliating effect, making this crochet soap sack both practical and luxurious.
Hang it to dry between uses to help your soap last longer.
Part of a Collection
This pattern is part of the Woodlands Fall Crochet Collection, a series of cozy and seasonal designs for your home.
Don’t miss the next pattern: A beautiful ruffle crochet table mat coming soon: ruffle crochet table mat (coming soon).
Tips For Crocheting A Pumpkin Soap Saver Pouch
- Keep your post stitch tension even - Try to keep your tension consistent when working front and back post stitches. Pulling too tightly can make the pouch pucker, while making a looser stitch helps bring it up to the height of the other stitches in the row, making the fabric flexible and easy to use.
- Check the fit with your soap bar - Soap bars can vary in size, so it helps to check the fit as you crochet. If needed, you can add or remove a few stitches to make the pouch to suit the shape of the soap bar you use.
- Cotton yarn works especially well - Cotton yarn gives good stitch definition, which helps the ribbed pumpkin texture stand out. It also handles regular use in water better than many other fibres.
- Let the pouch dry between uses - After use, hang the soap saver or place it somewhere with airflow so it can dry fully. This helps keep the pouch fresh and ready for the next use.
Materials
Yarn
#3 Light (light worsted, DK, 8ply) 100% cotton or cotton blend yarn with about 12 wraps per inch*
- Color A, pouch – 27 yards (25 meters)
- Color B, stem – 1 yard (1 meter)
- Color C, leaf – 8.7 yards (8 meters)
- Color D, drawstring – 3.2 (3 meters)
*Wraps per inch (WPI) - measures yarn thickness by counting how many times the yarn wraps around a ruler in one inch. More wraps thinner yarn, while fewer wraps thicker yarn.
Hook Size
- 4mm
- 3.5mm – for drawstring tie (optional)
- 5mm – for foundation chain (optional)
Tip: If your foundation chain tends to be tight, using a 5mm hook can help prevent the base from pulling in.
Notions
- Scissors
- Yarn needle
- Ruler
Stitches and Abbreviations - US Terms
- BPdc back post double crochet – see below
- ch – chain stitch
- col – color
- dc – double crochet
- FPdc – front post double crochet – see below
- hdc – half double crochet
- hk – hook
- lp/lps – loop/loops
- MR – magic ring
- rpt – repeat
- sc – single crochet
- sc2tog – single crochet 2 stitches together – see below
- sl st – slip stitch
- st/sts – stitch/stitches
- tr- treble stitch
- YO – yarn over
- [ ] – at the end of a row indicates the number of stitches in that row
Special Stitches And Terms
Front and Back Post stitches in crochet are worked around the post of a stitch from the previous row, rather than into the top two loops. These stitches create texture by pushing the stitch forward or backward in the fabric.
- Front Post stitches are made by inserting your hook from the front of the work to the back on the right-hand side of the stitch post. Bring the hook around the back of the post and back out to the front on the left-hand side of the post. The post will be in front of your hook. Complete the stitch as usual.
- Back Post stitches are made by inserting your hook from the back of the work to the front on the right-hand side of the stitch post. Bring the hook around the front of the post and insert it back into the fabric on the left-hand side, returning the hook to the back of the work. The post will be behind your hook. Complete the stitch as usual.
Single Crochet 2 Together
- Sc2tog - Insert hk in st, YO pull up lp, (2 lps on hk), insert hk in next st, YO and pull up lp (3 lps on hk), YO pull through 3 lps on hk.
Gauge & Finished Size
Finished size
- Width - approx. 5 inches (12.7 cm)
- Height - approx. 6 inches (15.2 cm)
Perfect for holding a standard bar of soap with room to lather.
Guage
Gauge not so important.
Pattern Notes
- Front and back post stitches create the ribbed texture that forms the pumpkin segments.
- Keep your tension even so the pouch stays flexible while still holding its shape.
- Check the fit against your soap bar as you work, as soap sizes can vary.
How To Crochet A Soap Saver Bag
Foundation, col A, 5mm hk – ch18
Row 1, 4mm hk – 1sc in 2nd ch from hk, 1sc in each st to end, turn. [17sts]
Row 2 – ch3 (count as 1dc) in the 1st st, 1dc in each st to end, turn. [17sts]
Row 3 – ch3 (count as 1dc) in the 1st st, 1dc in next st, *FPdc around next st, 1dc in next 2s-ts, rpt from * to the end, turn. [17sts]
Row 4 – ch3 (count as 1dc) in the 1st st, 1dc in next st, *BPdc around next st, 1dc in next 2-ts, rpt from * to the end, turn. [17sts]
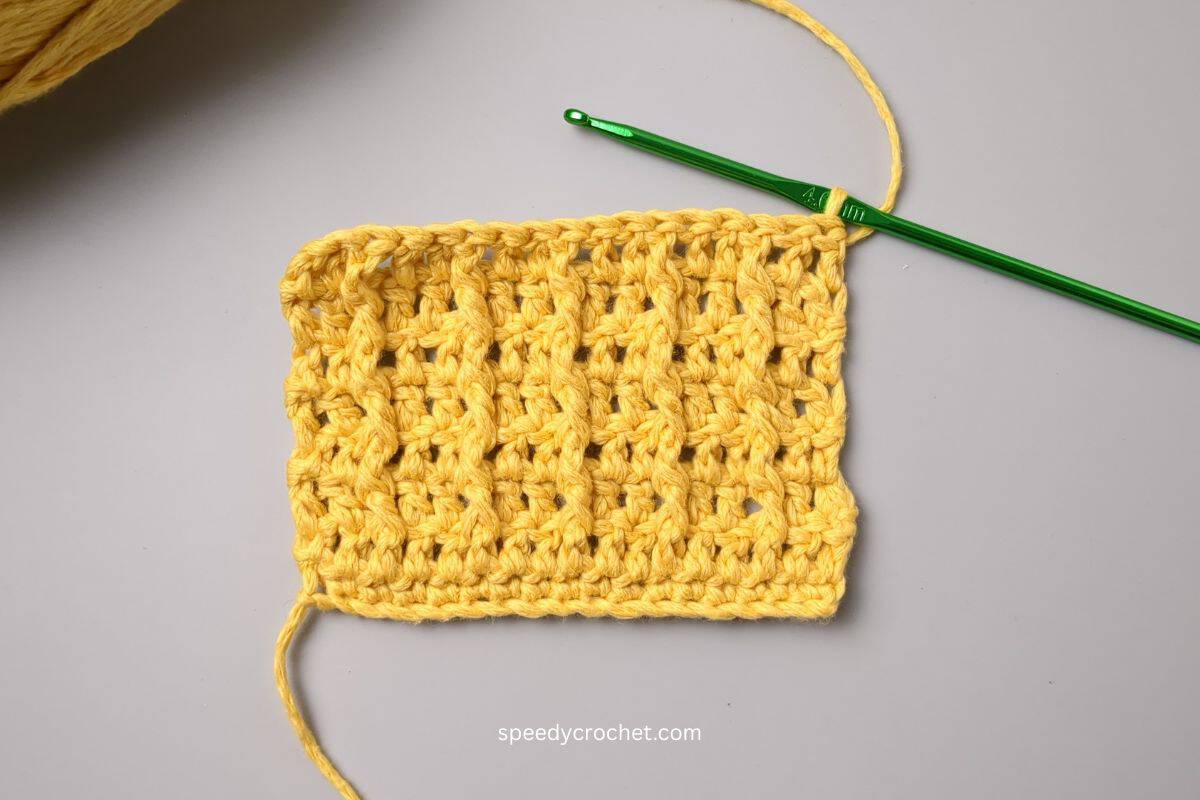
Repeat rows 3 and 4, 12 more times until you the piece is about 11 inches (28 cm) long, ending with a row 4.
Last row – 1sc in next 16-sts, then
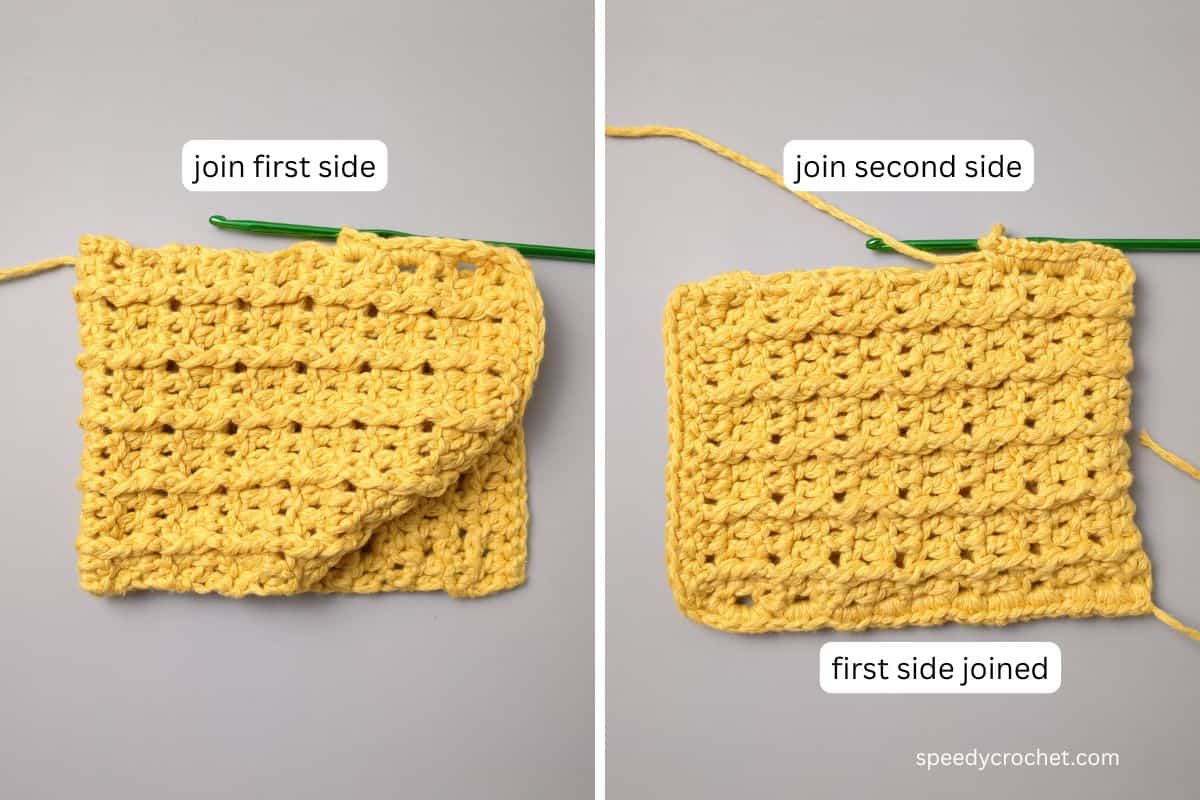
- Fold piece in half lengthwise (right side facing up),
- Join the first side - make 1sc in the last st of the top row working the stitch into the corresponding stitch on the other half,
- Match the ch-3 spaces along the side and join together by making 3sc in each ch-3 space until you reach the last ch-3 space make 1sc in this space, ch1 cut yarn, fasten off and weave in end.
- Join second side, working from the bottom to the to, line to top edges evenly, then work the same amount of stitches as you did for the first side, finish with a ch1, cut yarn, fasten off and weave in ends.
Stem
Along the top edge of one side, count 7 stitches in from the top right hand side and sl st yarn col B into this stitch.
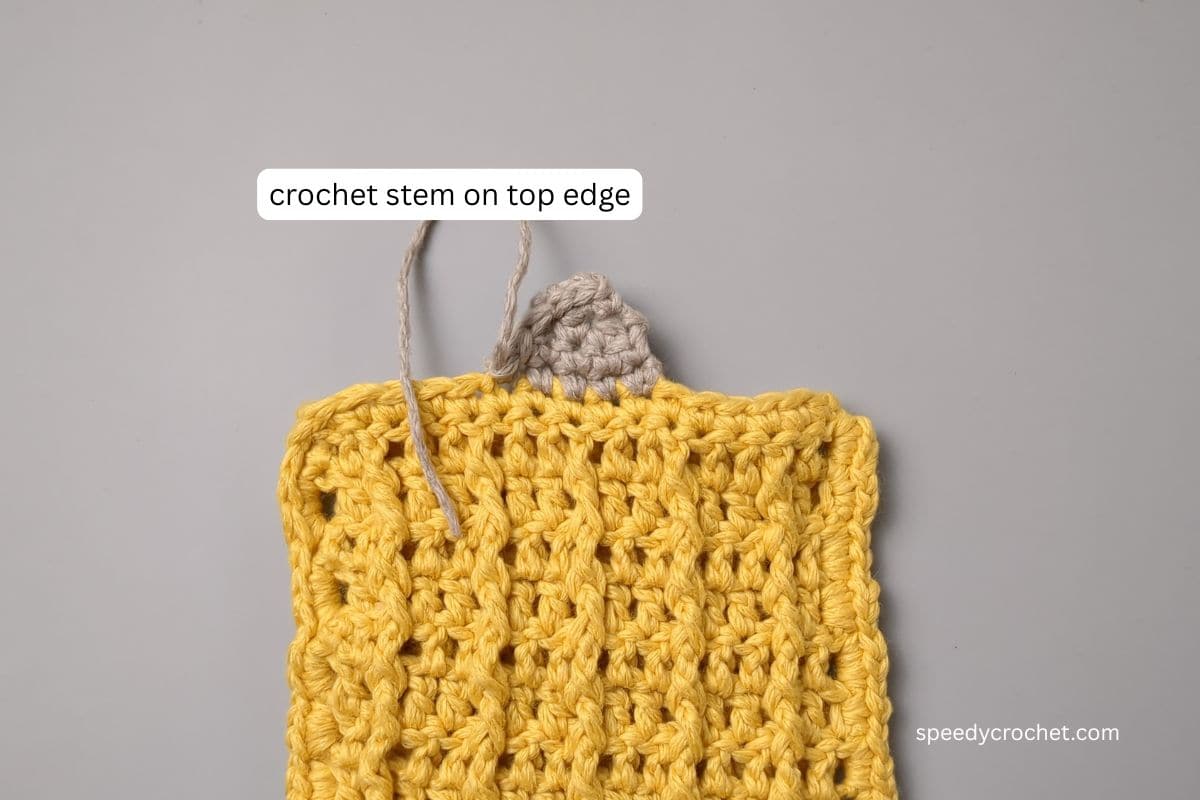
Row 1, col B, 4mm hk – 1sc in 1st st, 1sc in next 4-sts, turn. [5sc]
Row 2 – 1sc in each st, turn. [5sc]
Row 3 – sc2tog, 1sc in next st, sc2tog, turn. [3sc]
Row 4 – sc2tog, 1sc in next st, turn. [2sc]
Row 5 – make 5-6 sl sts along the top and down the edge making the last sl st into the top of the pouch in the same sp as the col B st of stem, ch1, cut yarn, fasten off and weave in end.
Leaf and Tendril
Rnd 1, col C, 3.5mm hk - 10sc in MR, sl st in 1st st to join. [10sc]
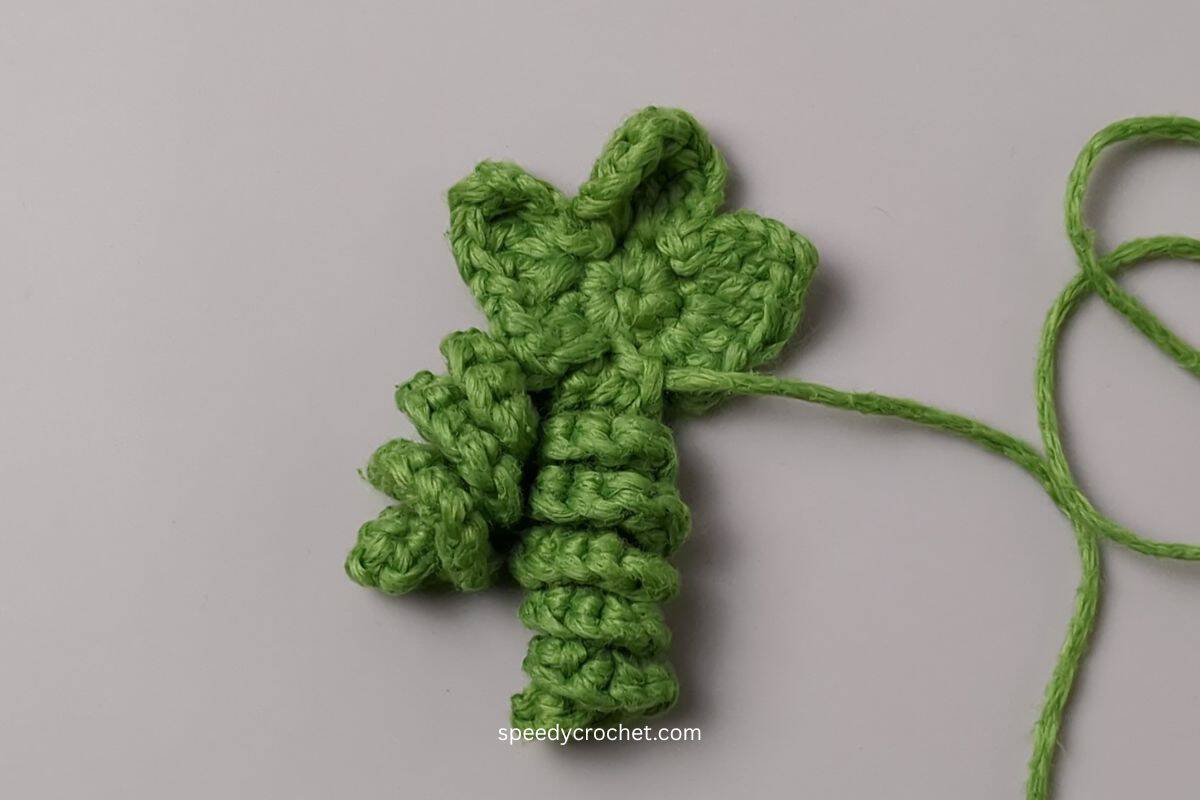
Rnd 2 - Ch1, (2hdc) in same sp as ch-1, (1hdc, 1dc) in next st, (1dc, 1tr, ch3, sl st) in next st, sl st into next st, (sl st, ch2, 1dc, 1tr) in next st, (1tr, 1dc, ch2, sl st) in next st, sl st in next st, (sl st, ch3, 1tr, 1dc) in next st, (1dc, 1hdc) in next st, (2hdc, ch1, sl st) in next st, sl st in next st, tendril 1 - ch14, 3sc in 2nd ch from hk, 3sc in next 13-sts, sl st into leaf edge, tendril 2 – ch20, 3sc in 2nd ch from hk, 3sc in next 19-sts, sl st into leaf edge, ch1, cut yarn, leave a long tail for sewing.
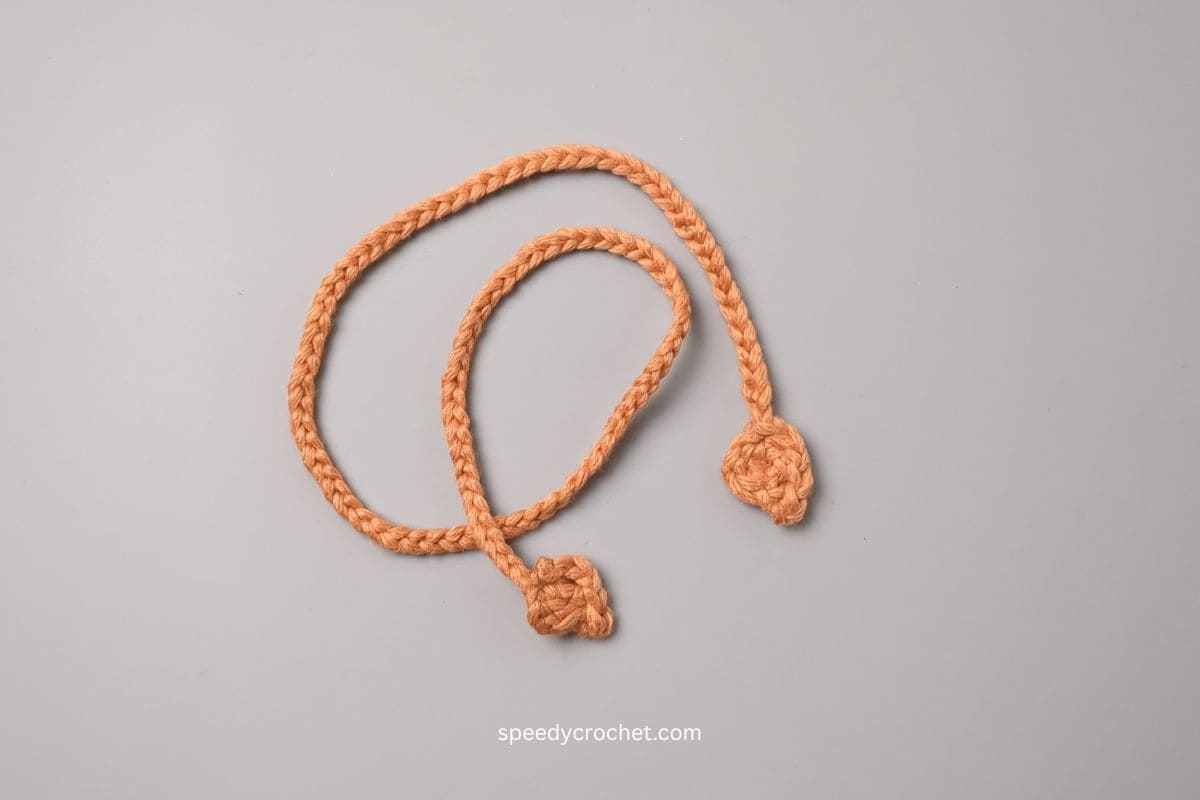
Drawstring Tie
Col D, 3.5mm hk – ch3, 1dc in 3rd ch from hk, ch2, sl st into 2nd ch from hk, (1dc, ch2, sl st) in same sp as 1st dc, ch 103, 1dc in 3rd ch from hk, ch2, sl st into 2nd ch from hk, (1dc, ch2, sl st) in same sp as 1st dc, ch1, cut yarn, fasten off, weave in ends – when weaving in the ends, close the hole in the leaf.
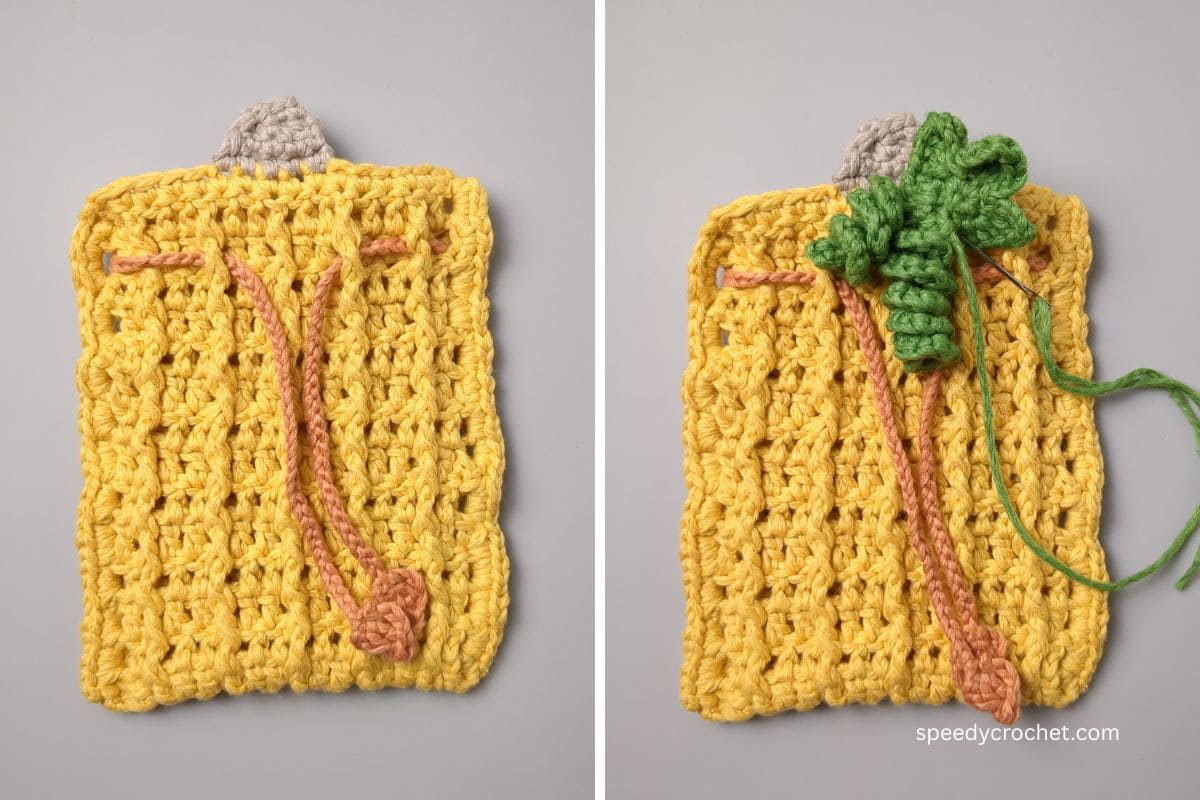
Finish
- Weave in the starting yarn tail from the leaf to secure the ring,
- then position the leaf over the right side of the steam with the tendril pointing to the left,
- Thread the remaining yarn tail onto a needle and sew the leaf into place on the right hand side of the stem.
FAQs – Crochet Pumpkin Soap Saver Pouch
A pumpkin crochet soap saver is a small crochet pouch shaped with a pumpkin-inspired design that holds a bar of soap. It helps you use every last piece of soap while adding a simple autumn touch to your bathroom.
Yes. A pumpkin crochet soap saver is a small practical project that can usually be finished in one sitting, which makes it a great quick autumn crochet make.
Cotton yarn is usually the best choice for a crochet pumpkin soap saver because it is absorbent, durable, and suitable for regular use in the bath or shower.
Yes. Small leftover pieces of soap can be placed inside the pouch so you can use them right down to the end instead of throwing them away.
Yes. A pumpkin crochet soap saver makes a practical handmade gift for autumn. It pairs well with handmade soap, bath accessories, or small seasonal gift sets.
Perfect For
- Fall bathroom styling
- Handmade gifts
- Market prep items
- Sustainable living swaps
- Anyone looking for easy crochet projects
Quick Crochet Pumpkin Soap Saver
This crochet soap saver pattern is proof that small projects can still make a big impact. It’s quick, useful, and a lovely way to bring handmade touches into your everyday routine.
Plus, it’s a great introduction to textured stitches while creating something you’ll actually use.
Looking for More Crochet for Fall?
If you love quick projects to crochet for fall, be sure to explore more:
More Easy 1 Hour Patterns
Looking for more patterns like this? Try these:
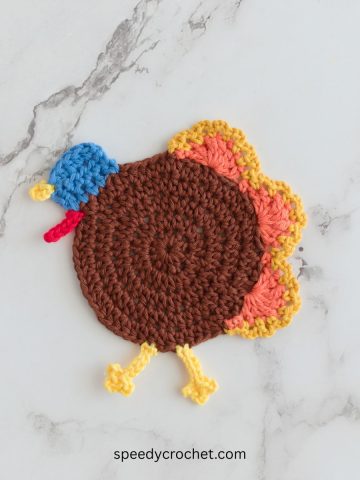
- Turkey Crochet Coaster Pattern (Cute Thanksgiving Crochet Project)
- Pie Crochet Coaster Pattern (Cute Fall & Thanksgiving Crochet Project)
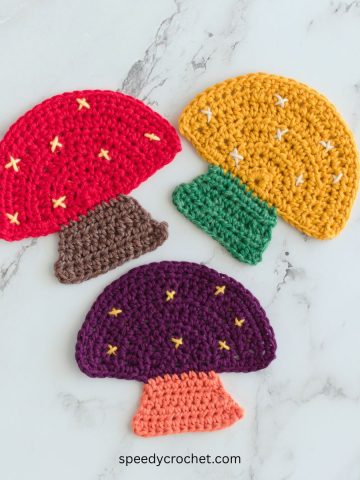
- Mushroom Crochet Coaster Pattern (Quick 30 Minute Fall Crochet Project)
- Acorn Crochet Coaster Pattern (Easy Fall Crochet Project)


If you tried this pumpkin crochet soap saver (or any other pattern on my website), please let me know how it went in the comments below. I'd love to hear from you!
What's Next?
- Pin this post: Save this post to Pinterest so that you can come back to it later.
- Share: Share a photo on social median and tag me @speedycrochet. We would love to see your creations!
- Leave a comment: Say hello and share your feedback in the comments section below.