Add a little spooky charm to your reading time with this fun witch crochet bookmark!
This Halloween crochet project features a classic pointy crochet Halloween witch hat at the top and a long, striped witchy leg that ends in a cute boot - perfect for peeking out from between the pages of your current read.
It is a creative way to crochet a bookmark that is both fun and functional.
This one is great for Halloween lovers, bookworms, and gift-givers alike!

If you’re looking for more quick crochet ideas, take a look at all 1 hour crochet projects.
Table of contents
Quick and Easy Crochet Witch Bookmark
Looking for a quick and quirky project to celebrate spooky season? This crochet Halloween witch hat bookmark is just the thing!
It is not your average bookmark - this one has a tall pointy hat at the top and a long striped leg and boot dangling from the bottom, as if a tiny witch crash-landed into your book.
It is a simple and fun crochet project with a lot of personality, perfect if you are looking for a unique way to crochet a bookmark for Halloween.
You can whip one up in an evening using leftover yarn, and it makes a great handmade gift or a playful addition to your Halloween decor.
Things To Note:
- Skill Level - Confident beginner. You will use basic stitches and simple shaping techniques, and color changes to create the hat, leg, and boot.
- Project Type - This is a crochet bookmark that is made up of a few small, quick-to-stitch parts and minimal sewing. The magic is in the assembly and color choices!
- Perfect for Gifting - These bookmarks are adorable tucked into Halloween books, small paper pouches, party favors, or as a handmade treat for fellow readers.
- Fun to Customize - Swap colors, add buckles, or make striped legs in different combos—it's easy to give each each bookmark a unique style!
- About the Yarn – You will want to use a fine weight yarn like #1 superfine for this project, to keep the bookmark small in size - which looks nicer than something big and bulky made in a heavier yarn weight.
Materials
Yarn
#1 superfine (sock, fingering, baby, 4ply) crochet cotton yarn with about 22 wraps per inch (WPI)* in the following colors.:
- Color A, black (hat, stocking stripes, shoe) – 10.95 yards (10 meters)
- Color B, orange (hat band) – 1.5 yards (1.5 meters)
- Color C, purple (stocking stripe) – 6.5 yards (6 meters)
- Color D, red (hat buckle) – 27 inches (70cm)
*Wraps per inch (WPI) - measures yarn thickness by counting how many times the yarn wraps around a ruler in one inch. More wraps thinner yarn, while fewer wraps thicker yarn.
Hook Size
- 2mm
Notions
- Scissors
- Yarn Needle
Stitches and Abbreviations - US Terms
- ch- chain stitch
- dc – double crochet
- hdc – half double crochet
- hk – hook
- sc – single crochet
- sl st – slip stitch
- sp – space
- st/sts – stitch/stitches
Finished Size

The finished size of this bookmark is about 10.5 inches (26.5 cm) long.
Instructions For Witch Crochet Bookmark
This fun witch crochet bookmark is made in three parts - a pointy witch hat, a striped leg, and a tiny boot. Each piece is worked separately and crocheted together as you go.
Witch Hat

Row 1, color A – ch4 (counts as ch1, and dc), dc in 4th ch from hk, turn. [2dc]
Row 2 – ch2 (count as dc), 1dc in same sp as ch2, 2dc in last st (into the 3rd ch of ch-4), turn. [4dc]
Row 3 - ch2 (count as dc) 1dc in same sp as ch2, 1dc in next 2-sts, (1hdc, 1sc) in last st, turn. [4dc, 1hdc, 1sc]
Row 4 – ch2 (count as dc), 1dc in next 5-sts, turn. [6dc]
Row 5 – ch2, (count as dc), 1dc in same sp as ch2, 1dc in next 4-sts, 2dc in last st (top of ch-2), turn. [8dc]
Row 6 – ch2 (count as dc), 1dc in next 7-sts, turn. [8dc]
Row 7, color B (carry and crochet over color A as you work this row) – ch2 (counts as hdc), 1hdc in same sp as ch2, 1hdc in next 6-sts, 2hdc in last st, turn. Cut color B yarn. [10hdc]
Row 8, color A – ch4, 1hdc in 2nd ch from hk, 1hdc in next 2-sts, 2dc in next st on hat, 1dc in next 8-sts, 2dc in last st, ch4, 1hdc in 2nd ch from hk, 1hdc in next 2-sts, sl st into same sp as the last 2hdc, cut yarn fasten of and weave in ends. [18sts]
Stocking
Notes:
- Do not cut between color changes, instead, carry the unused yarn color and crochet over it as you work the rows until the next color change, then swap the color.
- To change colors: Work your stitch as usual but stop before completing the very last yarn-over. Drop the current color, yarn over with the new color, and pull through the loop on the hook to finish the stitch. You’ll now be ready to continue crocheting with the new color.

With right side facing and brim side up, count 7-sts in from the right, and work over the 5 stitches at the center of the brim edge. Note: The right side of the hat has the tip of the hat pointing to the left.
Row 1, color C – ch2 (not a st) 1hdc in same sp a ch-2, 1hdc in next 4-sts, turn. [5hdc]
Row 2 - 3 – ch2 (not a st), 1hdc in same sp as ch2, 1hdc in next 4-sts, turn. [5hdc in each row]
Rows 4, color A – (carry unused color to the front of the work – the wrong side), ch2 (not a st), 1hdc in same sp as ch2, 1hdc in next 4-sts, turn. [5hdc]
Rows 5, color A – (carry unused color to the back of the of the work – the wrong side), ch2 (not a st), 1hdc in same sp as ch2, 1hdc in next 4-sts, turn. [5hdc]
Note, from now on:
- When carrying the yarn colors along continue in the manner above (yarn at front one row, yarn at the back the next, this will ensure that the front of the work will look nice and neat).
- Place a stitch marker on the right side of the hat to keep track of the right side of the bookmark.
Rows 6-8, color B – ch2 (not a st), 1hdc in same sp as ch2, 1hdc in next 4-sts, turn. [5hdc in each row]
Rows 9-10, color A - ch2 (not a st), 1hdc in same sp as ch2, 1hdc in next 4-sts, turn. [5hdc in each row]
Rows 11-13 color B – ch2 (not a st), 1hdc in same sp as ch2, 1hdc in next 4-sts, turn. [5hdc in each row]
Rows 14-15, color A - ch2 (not a st), 1hdc in same sp as ch2, 1hdc in next 4-sts, turn. [5hdc in each row]
✨ You're almost there! ✨
To unlock the final steps and complete your pattern, create a free account with Grow.me. below.
Make sure to tick the box to subscribe to our newsletter and stay up to date with the latest patterns, tips, and more!
Once you're signed up, you'll get instant access to finish your project and enjoy exclusive content in the future.
Already signed up? Hit the button below and select ‘Switch to Log In’ to pick up where you left off and finish your project!
Rows 16-18 color B – ch2 (not a st), 1hdc in same sp as ch2, 1hdc in next 4-sts, turn. [5hdc in each row]
Rows 19-20, color A - ch2 (not a st), 1hdc in same sp as ch2, 1hdc in next 4-sts, turn. [5hdc in each row]
Row 21-23 color B – ch2 (not a st), 1hdc in same sp as ch2, 1hdc in next 4-sts, turn. [5hdc in each row]
Rows 24-25, color A - ch2 (not a st), 1hdc in same sp as ch2, 1hdc in next 4-sts, turn. [5hdc in each row]
Row 26-28 color B – ch2 (not a st), 1hdc in same sp as ch2, 1hdc in next 4-sts, turn. [5hdc in each row]
Cut yarn color C, leave a tail for weaving in.
Shoe

Row 29, color A (shoe) – ch2 (not a st), 1hdc in same sp as ch2, 1hdc in next 3-sts, (1hdc, 1dc) in last st turn. [6hdc, 1dc]
Row 30 - ch5, 1sc in 2nd ch from hk, 1hdc in next 3sts of ch-5, (1dc, 1hdc) in next st of shoe, 1hdc in next 5-sts, turn.
Row 31 - ch2, dc in same sp as ch-2, 2dc in next st, ch2, sl st into next st, ch1, 1sc in next 4-sts, sl st into next 5-sts, cut yarn fasten off and weave in all ends.
Finishing
Shoe buckle
Buckle, color C - Ch8, sl st into 1st ch to form a ring, cut yarn, leave a long tail for sewing, fasten off and weave in starting yarn tail.
Attach buckle to shoe - Use the long yarn tail end to sew the buckle to the shoe, positioning half on the stocking and half on the shoe.

Hat buckle
Hat Buckle, color D – sl st a small rectangle over the hat band to represent a buckle, weave in ends.
Pattern FAQs
Yes, but I would not recommend it. Using a heavier yarn weight will make the bookmark larger and thicker than a standard bookmark. However, feel free to experiment with different yarn weight and hook sizes to get the look that you want.
Yes, this witch bookmark is safe for kids, as it has no small parts or pieces that can easily be removed.
Of course! The crochet Halloween witch hat with the striped stocking makes a fun bookmark.
Yes, the bookmark can be made longer. All you need to do is add addition rows of stripes for the stocking before finishing off with a shoe.

More Easy Halloween Crochet Patterns
Looking for more patterns like this? You might like this cute amigurumi bat or this mummy crochet treat bag or these:
- Turkey Crochet Coaster Pattern (Cute Thanksgiving Crochet Project)
- Pie Crochet Coaster Pattern (Cute Fall & Thanksgiving Crochet Project)
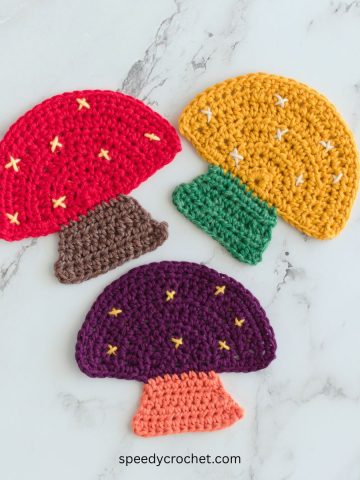
- Mushroom Crochet Coaster Pattern (Quick 30 Minute Fall Crochet Project)
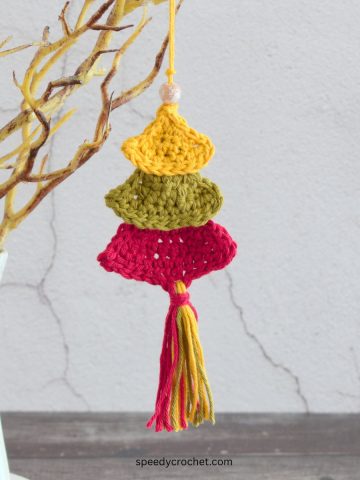
- Easy Crochet Christmas Tree Decoration

If you tried this witch crochet bookmark (or any other pattern on my website), please let me know how it went in the comments below. I'd love to hear from you!
What's Next?
- Pin this post: Save this post to Pinterest so that you can come back to it later.
- Share: Share a photo on social median and tag me @speedycrochet. We would love to see your creations!
- Leave a comment: Say hello and share your feedback in the comments section below.