These mini crochet Christmas stockings are quick to make and perfect for giving your home a festive look. You can even use them to decorate gifts, slip them into Christmas cards as small gifts, use them as gift card holders, or string them together to make a garland for the mantle.

Want more fast and satisfying makes? Explore the full collection of 1 hour crochet projects.
Table of contents
Things To Note:
- This is a simple pattern that is suitable for a beginner.
- The mini crochet stockings are made in two halves, and then slip stitched together.
- Once you are familiar with the pattern they are quick to make and you can easily then in 30 minutes or less.
- We have tested these little crochet stockings in both #3 light worsted and #4 worsted weight yarn. Both yarn weights work well.
- If you are looking for a crochet Christmas stocking gift card holder pattern you can easily use this pattern, crochet them in #4 worsted weight yarn and a 4.5mm - 5mm crochet hook. When made in this size they also make great little treat bags.
- For Christmas tree decorations, we prefer to use #3 light or #2 fine yarns, they work up smaller and we find this size looks better on our tree.
- Single crochet stitches are used for the stocking and half double crochet stitches are used to make a fold-down cuff.
- For making the stockings we like to go down half a hook size to the recommended size on the yarn labels - for example, if a 4 mm hook is recommended use a 3.5mm hook. However, feel free to use any hook size you prefer to get the final look you want for your stockings.
- The stocking pattern includes an optional crocheted hanging loop. For this, we recommend that you go down one to two whole hook sizes this will give you nice tight stitches which makes the hanging loop look better.
Materials
Yarn
Gift card holder size use:
#4 medium (worsted 10ply, Afghan, Aran) acrylic yarn, with about 11 wraps per inch (WPI)* :
- Color A (stocking) - 24.2 yards (24 meters)
- Color B (cuff) - 10.9 yards (10 meters)
Small tree decoration size use:
#3 Light (light worsted, DK or 8ply) acrylic yarn, with about 12 wraps per inch (WPI)*:
- Color A (stocking) - 22.9 yards (21 meters)
- Color B (cuff) - 8.7 yards (8 meters)
*Wraps per inch (WPI) - measures yarn thickness by counting how many times the yarn wraps around a ruler in one inch. More wraps thinner yarn, while fewer wraps thicker yarn.
Crochet Hook
Gift card holder size (use #4 medium yarn)
- 4.5mm hook
- 3 mm hook
Tree decoration size (use 3# light yarn)
- 3.5mm hook
- 3 mm hook
Notions
- Scissors
- Yarn needle
Stitches and Abbreviations - US Terms
- MR – magic ring
- sc – single crochet
- hdc - half double crochet
- sc2tog - single crochet two stitches together -see special stitches below
- RSC - reverse single crochet - see special stitches below
- st/sts – stitch/stitches
- sl st – slip stitch
- hk - hook
- rnd – round
- rpt – repeat
- YO - yarn over hook
- [ ] - at the end of a row, indicates the number of stitches in that row
Special Stitches
sc2tog
A single crochet decrease is a way to decrease the number of stitches in a row or round. It is done by partially working two single crochets in two consecutive stitches and completing them as one stitch.
- Insert the hook into the first stitch.
- Yarn over and pull up a loop, you will have 2 loops on your hook.
- Insert the hook into the next stitch.
- Yarn over and pull up a loop, you will have 3 loops on your hook.
- Yarn over and pull through all 3 loops on your hook.
- This completes the sc2tog.
Abbreviated version
sc2tog - Insert hk in st, YO pull up loop, (2 loops on hk), insert hk in next st, YO and pull up loop (3 loops on hk), YO pull through 3 loops on hk.
Reverse Single Crochet (RSC)
- Insert the hook from the front to the back, in the next stitch to the right of the hook.
- Yarn over hook (YO) and draw the yarn back through the stitch. You will now have two loops on the hook.
- Yarn over hook (YO) pull the yarn back through the two loops on the hook.
- This completes one reverse single crochet stitch.
Abbreviated version
RSC - Insert hk from front to back of next st to the right of the hk, YO pull yarn through st, YO pull yarn though both loops on hk.
Finished Size

Crochet Christmas stocking gift card holders - When made in #4 worsted yarn (with about 11 wraps per inch) and a 4.5 mm hook these are about 5.5 inches (14 cm) long and about 2.5 inches (6.5 cm) wide.
Crochet Christmas stocking tree decorations - When made in #3 worsted yarn (with about 12 wraps per inch) and a 3.5 mm hook these are about 4 inches (10 cm) long and about 2 inches (5 cm) wide.
Gauge
The gauge is not so important for this pattern.
Instructions
Stocking (make 2 pieces)

Foundation, color A - ch18
Rnd 1 - 1sc in 2nd ch from hk, then 1sc in next 8-sts, sc2tog, 1sc in next 5-sts, 4sc in last st, (work on the other side of the foundation chain) 1sc in next 4-st, 2sc in next st, 1 sc in next 10-sts, ch1, turn.[34st]
Rnd 2 - 1sc in next 10-sts, 2sc in next st, 1sc in next 4-sts, 2sc in next 4-sts, 1sc in next 5-sts, sc2tog, 1sc in next 9-sts, ch1, turn. [39st]
Rnd 3 - 1sc in next 8-sts, sc2tog, 1sc in next 4-sts, 2sc in next 8-sts, 1sc in next 5-sts, 2sc in next, 1sc in next 11-sts, ch1, turn. [47st]
Rnd 4 - 1sc in next 11-sts, 2sc in next st, 1sc in next 25-sts, sc2tog, 1sc in next 8-sts, ch1, for 1st stocking piece cut the yarn, fasten off and weave in the ends. [47st]
When finishing the 2nd stocking piece, do not cut the yarn because you will continue to crochet the two pieces together, but weave in the starting yarn tail end.
✨ You're almost there! ✨
To unlock the final steps and complete your pattern, create a free account with Grow.me. below.
Make sure to tick the box to subscribe to our newsletter and stay up to date with the latest patterns, tips, and more!
Once you're signed up, you'll get instant access to finish your project and enjoy exclusive content in the future.
Already signed up? Hit the button below and select ‘Switch to Log In’ to pick up where you left off and finish your project!
Join together

- Lay the two pieces together, and slip stitch down the front of the boot, around the toe, and up the back, leaving the top open, and chain 1 - then choose one of the options below:
- Option 1 - You can cut the yarn and weave in the end and make a stocking without a hanging loop.
- Option 2 - If you prefer a hanging loop on the stocking, cut the yarn and leave a long tail at least 31 inches (80cm) long. Tuck the yarn tail inside the stocking to keep it out of the way when making the cuff - this will then be used to crochet a hanging loop once the cuff is finished.
Cuff

Rnd 1, color B -sl st into any st at the top opening, ch1 (does not count as a st), evenly work 20sc across the top, sl st into 1st st to join.
Rnd 2-5 - Ch2 (not counted as a st), make 1hdc in each st, sl st into 1st st to join, ch1. [20sts in each rnd]
Rnd 6 - RSC into each st around, sl st into 1st st to join, cut yarn, fasten off, and weave in ends.
Optional - Hanging loop

- Fold the white cuff down to where the two colors join, and pull out the yarn tail you tucked into the stocking earlier.
- Use a 3mm crochet hook, and from the inside of the stocking, slip the hook under a stitch and pull up a loop, chain 40 (or as many as you need to get your desired loop length), pull yarn through the last chain stitch, pull the yarn tail through the stitch to fasten off.
- Thread the yarn tail onto a needle and sew the end to the inside of the stocking, close to the first chain made to form the loop, fasten off, and weave in the ends.

More Easy Crochet Patterns
Looking for more patterns like this? Try these:
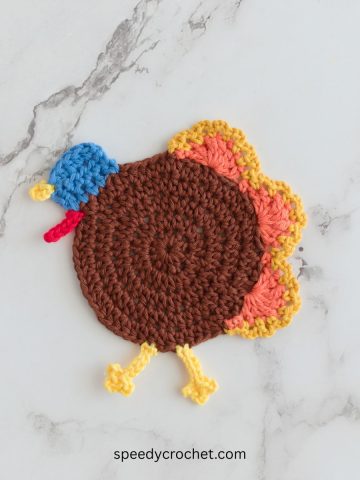
- Turkey Crochet Coaster Pattern - Easy Thanksgiving Project
- Pie Crochet Coaster Pattern (Cute Fall & Thanksgiving Crochet Project)
- Mushroom Crochet Coaster Pattern (Quick 30 Minute Fall Crochet Project)
- Easy Crochet Christmas Tree Decoration

If you tried this mini crochet Christmas stockings pattern (or any other pattern on our website), please let us know how it went in the comments below. we would love to hear from you!
What's Next?
- Pin this post: Save this post to Pinterest so that you can come back to it later.
- Share: Share a photo on social median and tag me @speedycrochet. We would love to see your creations!
- Leave a comment: Say hello and share your feedback in the comments section below.