This half double crochet beanie is soft, simple, and full of texture. It’s worked from the bottom up, starting with a stretchy single crochet ribbed band and finished with rows of half double crochet in the back loops for a classic knit-like look.
The hat fits snugly for a comfortable, stylish shape and can be topped off with an optional crochet flower for a touch of charm.
Made with light worsted yarn, this adult beanie pattern takes about 2–3 hours to make—perfect for an afternoon project!

There’s nothing better than a cozy handmade beanie when the weather turns chilly - and this one is as easy as it is beautiful just like this crochet cat beanie.
This half double crochet beanie pattern is worked from the bottom up, making it simple to adjust for size and style. With its soft texture and clean shape, it’s the kind of hat that looks great on everyone.
What makes this pattern special is its combination of simple stitches and elegant texture. The hat begins with a single crochet ribbed band, which gives you that perfect stretch around the brim.
Once the band is joined into a loop, the rest of the hat is worked directly into it using half double crochet stitches in the back loops only. This creates a lovely, ribbed texture that looks almost knitted, but without the need for needles!
The finished result is a fitted beanie that feels soft and warm, with just the right amount of stretch. You can keep it simple for a classic look or dress it up with an optional crochet flower for a touch of personality.
It’s a great pattern for beginners who want to practice basic stitches and learn how to shape a hat without complicated decreases.
Best of all, it’s quick! You can make this beanie in about 2 to 3 hours, making it a perfect last-minute gift or weekend project.
Table of contents
- Things To Note:
- About the Design
- Choosing the Right Yarn and Hook
- Tips for Success
- Fun Variations to Try
- Perfect for Beginners and Quick Makers
- Styling Your Beanie
- Materials
- Stitches and Abbreviations - US Terms
- Finished Size
- Gauge
- Pattern Notes
- Instructions - HDC Beanie
- ✨ You're almost there! ✨
- Finishing
- Pattern FAQs
- More Wearable Crochet Patterns
- What's Next?
- Comments
Things To Note:
- Beginner Friendly - Uses simple stitches that are easy to learn and repeat.
- Quick to Make - Finish in just a few hours!
- Beautiful Texture - Working hdc in the back loops creates a soft, knit-like look.
- Fitted and Comfortable - Stretches gently for a snug, cozy fit.
- Optional Flower Detail - Add a little charm with a crochet flower or leave it plain.
- Perfect Gift Idea - Great for birthdays, holidays, or just because!
About the Design
This adult beanie pattern starts with the brim, which is worked flat in rows using single crochet stitches through the back loop only.
This creates a ribbed texture that stretches nicely, giving you that snug fold-over band feel without being tight.
Once your brim is the right length to fit around your head, you’ll join the ends to form a loop.
From there, you’ll start working in rounds to build the main body of the hat.
The entire body is made using half double crochet stitches worked in the back loop only.
This is what gives the hat its signature texture - a series of soft, horizonal ridges that look almost like knitting.
It’s simple, relaxing, and incredibly satisfying to watch the texture appear as you go.
When you reach the top, you’ll start decreasing to shape the crown, then close the hat.
The shaping is easy to follow, and because it’s worked in the round, there’s no sewing required - just weave in your yarn tail at the end.
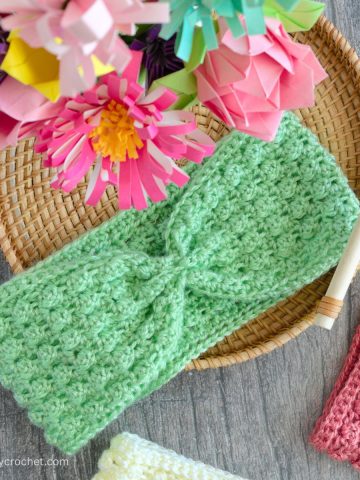
If you want to add a bit of decoration, you can finish it off with a crochet flower.
The flower adds a nice handmade touch and looks great placed on the side of the brim. You can make it in a matching color for a subtle accent, or in a contrasting color to make it pop!
Choosing the Right Yarn and Hook
This pattern works best with light worsted weight yarn (category 3 or light 4). It gives the hat a soft, flexible texture without being too thick or heavy. Acrylic yarns are great for easy care, while cotton blends give a lovely drape and definition to the stitches.
A few color ideas
- Classic Neutral - Gray, cream, or taupe for a timeless look.
- Soft Pastels - Blush, lilac, or mint for a feminine touch.
- Bold & Modern - Deep teal, burgundy, or charcoal for a statement piece.
- Festive - Red with a white flower for a cute Christmas version.
Use the hook size recommended on your yarn label or one size larger for a slightly looser, more flexible fabric.

Tips for Success
- Keep your tension even - Loose, consistent stitches make the texture stand out.
- Join rounds neatly - Slip stitch gently to avoid visible seams.
- Use a stitch marker - They help you keep track of your rounds.
Fun Variations to Try
- Add a Pom-Pom - A faux fur or yarn pom-pom adds instant charm.
- Change the Flower Style - Try a rose, daisy, or layered flower to suit your mood.
- Play with Color - Make the hat in one color or use self-stripping yarn for a unique look.
- Add Buttons - Sew a small decorative button in the center of the flower for extra flair.
- Make It Slouchy - Add extra rows before shaping the crown for a relaxed fit.
- Stripe It Up - Use leftover yarn to make soft, subtle color stripes throughout.
Perfect for Beginners and Quick Makers
This pattern is a great introduction to crocheting in the round and working in the back loop only. Both techniques are simple to learn and look impressive when finished.
The hdc back loop texture gives the hat a beautiful, ribbed look that’s timeless and elegant, while still being easy enough for newer crocheters to master.
Because it only takes 2 to 3 hours, it’s perfect for when you want a fast, satisfying project. You can make one in the evening, wear it the next day, or create a few for gifts throughout the season.
This beanie also makes a great addition to your craft fair or market table - it’s stylish, simple, and quick to make in different colors.
Styling Your Beanie
This crochet hat is designed to be fitted and comfortable. The ribbed brim hugs gently without feeling tight, and the textured body adds interest without bulk. You can wear it with the brim folded up for a snug fit, or unfold it slightly for a relaxed look.
If you’ve added the flower, wear it tilted slightly to the side for a pretty, classic style.
Or skip the flower and top it with a pom-pom for a cozy, playful vibe. Either way, it’s a versatile beanie that goes with everything - from casual jackets to warm winter coats.
Materials
Yarn
- #3 light (light worsted, DK 8ply) yarn with about 12 wraps per inch (WPI)*
- Color A, grey – 37 yards (35 meters)
- Color B, blue – 70 yards (64 meters)
*Wraps per inch (WPI) - measures yarn thickness by counting how many times the yarn wraps around a ruler in one inch. More wraps thinner yarn, while fewer wraps thicker yarn.
Hook Size
- 5.5mm
Notions
- Scissors
- Yarn Needle
Stitches and Abbreviations - US Terms
- BL – back loop
- BLhdc – half double crochet worked in the back loops
- BLhdc2tog – half double crochet decrease made in the back loops
- BLsc – single crochet worked in the back loops
- Ch – chain
- Hk – hook
- Rnd – round
- Rpt – repeat
- Sc – single crochet
- Sl st – slip stitch
- St/sts – stitch/stiches
- [] – at the end of a round indicates the number of stitches in that round
Finished Size

This beanie suits head sizes 18-21 inches (45-53cm) in circumference.
Finished hat size 9 inches (22cm) wide when laid flat and 6.5 inches (16.5cm) tall when laid flat.
Gauge
4x4 inches (10x10cm) = 13 half double crochet stitches and 12 rows
Pattern Notes
- To start the 1st hdc of each rnd instead of a ch1 pull up the loop slightly (but don't make it too loose) then make the hdc.
Instructions - HDC Beanie
Ribbing Band
Foundation, col A – ch10
Rnd 1 – 1sc in 2nd ch from hk, 1sc in each st, turn. [9sts]
Rnd 2 – ch1 (not a st), BLsc in same sp as ch-1, BLsc in each st, turn. [9sts]
Repeat rnd 2 until the band measures about 18inches (45.7cm) or your desired head circumference – we got 62 rows. Do not cut the yarn after making the last row.
Your row count may vary, and that’s perfectly fine. Differences can occur due to variations in head circumference measurements, yarn weight, or tension. It also doesn’t matter whether you have an even or odd number of rows for this pattern to work.
Finish the band
Fold the band in half, aligning the short edges, and join with 9 slip stitches through both layers. Turn right side out

Hat Body
Rnd 1 – ch1 (not a st) 1sc in same sp as ch-1, 1sc in each st around, sl st into the 1st sc to join.
You should have the same amount of stitches as the number of rows you made in the hat band. For my hat I made 62 rows for the band and crocheted 62 stitches around the top of the band.

Rnd 2, col B – 1hdc in same sp as sl st, 1dc in each st around, sl st into the BL of the 1st hdc to join. [62sts]
Rnd 3-9 (7 rnds) - BLhdc in next st, then BLhdc in each st around, sl st into the BL of the 1st hdc to join. [62sts]
✨ You're almost there! ✨
To unlock the final steps and complete your pattern, create a free account with Grow.me. below.
Make sure to tick the box to subscribe to our newsletter and stay up to date with the latest patterns, tips, and more!
Once you're signed up, you'll get instant access to finish your project and enjoy exclusive content in the future.
Already signed up? Hit the button below and select ‘Switch to Log In’ to pick up where you left off and finish your project!
Rnd 10 – BLhdc in next st, *BLhdc2tog, BLhdc in next 2-sts, rpt from * around, BLhdc in last st, sl st into BL of the 1st hdc to join. [47sts]

Rnd 11 - BLhdc in next st, * BLhdc2tog, BLhdc in next st, rpt from * around, sl st into BL of the 1st hdc to join. [32sts]
Rnd 12 - BLhdc in next st, * BLhdc2tog, BLhdc in next st, rpt from * around, BLhdc in last st, sl st into BL of the 1st hdc to join. [22sts]
Rnd 13 - * BLhdc2tog, rpt from * around, sl st into 1st hdc to join, cut yarn, leave a long tail for sewing and fasten off. [11sts]
Flower – optional
The flower pattern I used is my puff stitch flower – I used 5.5mm hook and the same yarn weight at the hat.
Finishing
Thread the yarn tail onto a needle and weave in around the front loops of each of the stitches in the last round, pull tight to cinch close, fasten off and weave in ends. Optional - sew on the crochet flower.

Pattern FAQs
Yes! To make it smaller or larger, adjust the number of rows in your brim (for head size) and the number of rounds in your main body (for height).
No problem! The beanie looks great on its own. The flower is completely optional and can be added or removed anytime.
You can! Just keep in mind that it’ll make the hat bulkier and warmer. Adjust your hook size and reduce your stitch count if needed.
More Wearable Crochet Patterns
Looking for more patterns like this? You might like this easy crochet adult beanie or try these:

If you tried this half double crochet beanie pattern (or any other pattern on my website), please let me know how it went in the comments below. I'd love to hear from you!
What's Next?
- Pin this post: Save this post to Pinterest so that you can come back to it later.
- Share: Share a photo on social median and tag me @speedycrochet. We would love to see your creations!
- Leave a comment: Say hello and share your feedback in the comments section below.